Well, it's been a while - a long long long while! I did this little tutorial for The CSI Project a little while back and forgot to share it here - so here it is:
I know we've all seen clipboards decorated with paper, ribbon, paint, etc. I think I've made more than I could use in a lifetime!! BUT, I was walking through a store a few weeks ago and saw a super cute clipboard. It had a great shape to it - not just your basic clipboard shape. The problem - it was $13.99 and that's just nuts!! So, I picked up a clipboard from the dollar store and got some tools out.
Supplies needed:
Clipboard
Template with desired shape
Dremel (or similar tool)
Paint (optional)
Patterned paper
Mod Podge
Sand paper or nail file
Adhesive runner (optional)
First, I found a shape I wanted for the bottom of the clipboard. I used my Silhouette to cut the shape I wanted, but you could sketch it out, or print it and cut it out. I traced the shape on my clipboard and got busy.
I used a Craftsman tool that's similar to the Dremel. I started slow and sanded away right below the line I drew.
Since the bottom of my design ended close to the bottom of the clipboard, I just started at the edge and drilled in for that small section.
Then I moved to the side areas and I sanded, sanded and then sanded some more. I just continued to sand and sand until I could see a little light through the clipboard.
I was able to just break off the bottom section eventually.
As with any project, be sure to wear proper safety gear and remember to not let your tools overheat. I stopped three or four times to give the Craftsman a break and cool off a bit since this took a lot of sanding.
Once the bottom section was removed, I sanded along the edge and smoothed it out. I went ahead and sanded all the way around the clipboard, front and back, just to have a consistent look!!
Here's a close up:
Now it's time to move on and decorate the board. I decided not to paint my clipboard since the paper I picked went well with the natural color of the clipboard. If you want to paint, this is the time to do that. Then you can pick your paper.
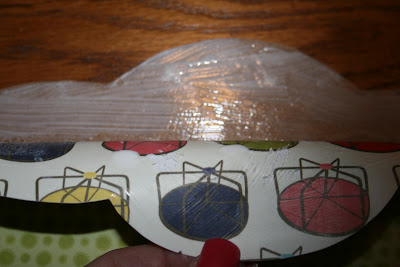
I coated the back of the paper and the clipboard with Mod Podge and then placed my paper on the clipboard. I use extra Mod Podge on the curved end since there isn't a straight edge.
Then I coated the top of the paper with Mod Podge. I would give the clipboard time to dry before applying the top coat of Mod Podge. This is when you wait and wait and wait for the Mod Podge to dry!
I added a few scraps of paper to the top of the clipboard, as well, applying it the same way.
Once my clipboard was mostly dry, I took a nail file and filed off the edges all the way around the clipboard.
I decided to add a piece of ribbon around the clipboard and I attached this with my adhesive runner. I'm thinking I could loosen the ribbon and slip a pen in and tie it back!!
And here's my finished clipboard - I simply added a cute note pad and it's done.
I had everything on hand except the clipboard and it was only $1!! I really want to make a few more and try different designs. We have friends we play cards with and one would be really cute to use for us to keep score on. I think I'll make another one with a scalloped border. And Teacher Appreciation is just around the corner and you know teachers can always use a clipboard and there's even room to put a name across the bottom!
Thanks for stopping by today and I hope you enjoyed this little tutorial - now go run to a dollar store and get crafty!!
Thanks for stopping by!
Lisa


No comments:
Post a Comment