Saturday, May 14, 2011

Teacher Appreciation

Well, I always say I'm going to get better at this whole blogging thing and then life happens and I fail! I've been subbing like crazy lately but the school year is winding down now and I only have three days lined up for the remaining weeks.  Kind of glad for a little break though because I need to get on the ball with some end of the year teacher gifts.  Our school didn't really do anything for Teacher Appreciation because the week we would have celebrated, our area was recovering from the tornadoes that blew through the previous week.  So, I'm putting my creative energy into end of the year teacher gifts instead.

Cole has a great teacher this year.  I always love to make things for his teachers at the end of the year.  He requires a little more 'teaching' than the 'normal' child so I like to go a little beyond the typical gift.  Here's a link to last year's gift.  Two other moms went in with me for that so it was a lot!!  This year, I'm on my own but I'm still shooting for the same type of gift.
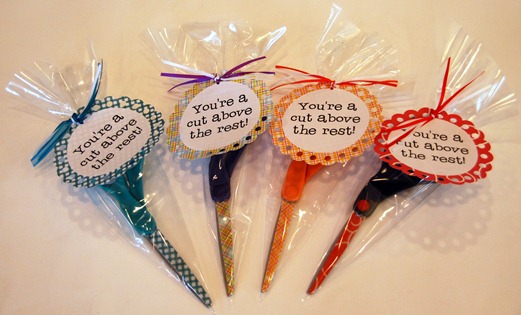
One of these:


And you can see how to make this here!! 
And then one of these:


I found directions for this last year here
Cole also has a Special Ed teacher that works for him and then an Occupational Therapist, too.  In the last few years I just have run out of time when it comes to making something for them.  I feel bad that they've been neglected since they are so important to his education, too.  So, this year, I'm planning on making them something, too.  Here's the idea for them - you can see the directions here:


This is a girl's emergency clutch.  The inside has small Ziplock bags sewn in and you put all your little supplies in the bags. 

I love this idea.  I'm thinking I want one for me to use for my jewelry when we go out of town.  I usually throw everything in a little hinge top jewelry box that a necklace came in.  If I take bracelets or necklaces, it's a tangled mess, so I'm thinking it would be a better solution to use one of these.

Oh, wait - I'm planning teacher gifts, not stuff for me!!  So, I think I'll fill it up with a little pack of gum, some bandages, shout wipes, and germx wipes.  Then I'll attach a little tag with suggestions - the blog that posted the tutorial had great suggestions for the bags (medicine, tweezers, nail file, spare house key, etc).

Here are some other ideas that I really love, but probably won't have time to get to this year - but I'll keep them in mind for gifts next year!!

This one is really cute - directions here:


And I totally forgot I bookmarked this one - I may have to do this for this year, too!!  I love these!


And this is too cute - a free printable - too bad I don't have colored ink right now!!


Wow - too many options, too little time.  But now that I have a Silhouette, it's much easier to get cool things like these done!!  Can't wait to get them all finished up next week before the end of the year parties at school!!

Thanks for stopping by!!

lisa

Saturday, May 7, 2011

Welcome wreath tutorial

 I've been meaning to post this for a while, but have had no internet due to the storms that came through Alabama last week.  Storms isn't really a strong enough word - but I'll leave my thoughts on that for another time!

I'm a big fan of decorating but hate to change things each season. I just took down the Easter decorations yesterday!!  I hate the idea of changing what's on my front door every month or so.  Actually, I love the idea, but just can't seem to actually do it.  So, I thought it would be fun to make something that I could easily change each month, season or special occasion.  Here it is:


Here's what you need:

A wreath
piece of scrap wood
sand paper
paint (chalk board and color of your choice)
ribbon
chalk
drill and drill bit
two dowels
patience (I hate waiting for paint to dry)
misc. items to change it out as the times change - (burlap, paint, letter stickers, ribbon)

I started with these supplies:


I very carefully measured out where I wanted my holes - and marked the spots with a pen and then went outside to drill.  And by 'very carefully' I mean, I eyeballed it and used a piece of ribbon that was laying around!!


Next I drilled two holes.  I don't have a fancy work place to do any drilling.  I just go out on my front porch, hold the wood down with my feet and drill over the edge of a step.  It works for me, but does tend to make a mess. 


See, two holes!!


Next, I sanded the edges just to smooth it all out.


Next, I spray painted with my chalkboard paint.  I did several coats, as this type of wood just soaked up the paint.


Once it was dry, I gave it a day and then chalked it up and wiped it clean.  It was ready to go.

I picked a mid sized grapevine wreath, grabbed my ribbon and chalkboard plaque and got to work.


Cut two pieces of ribbon - I didn't measure, just cut about 18 inches each. I found that a satin ribbon worked better here - I got a tighter knot and prettier bow.  Simply thread your ribbon through one spot on the wreath, through the back and back around to the front, double knot it and thread one piece of ribbon through the hole in the plaque and then tie a simple bow.


Now, pick your next spot and thread the second piece of ribbon through, double knot and thread through second hole and finish with a bow.


Now your plaque is attached and you could just simply hang it up, write a message and be good to go.But if you want to personalize it more, keep reading!!


I decided to attach two dowels (which I quickly spray painted with my favorite Krylon Ocean Breeze Blue.  You could pick a more neutral color, but this is my current fave, so I went with it!!) I simply applied hot glue to the bottom of each dowel and stuck it in behind the chalkboard plaque.  Then added a bit more hot glue to the top part of the dowels to attach to the wreath.  You can see in the photo that I didn't hot glue at the very top of the dowels - that's so you have some room to wrap your ribbon around the top.


Now, I can change out my decorations easily by tying on a different item between the two dowels.  For my wreath right now, I painted a little bunny face on a piece of burlap.  I stitched a second piece of burlap to the back (starting at the bottom, going around the ears and stopping about an inch from the first stitch) and stuffed the bunny head with some cotton batting and finished off the bottom with a few more stitches.  I used the hot glue gun to attach the little bunny head to some ribbon (about 3 yards long) and then tied the ribbon on to my two dowels.


Here's the Easter/Spring wreath:


Here's another idea to hang from the dowels - a little Welcome sign!  We have friends that we hang out with most weekends - this would be a fun way to great them next time they come over. 


The options are endless! You could cut out some flowers from the burlap, add some paint, or leave them plain and attach them to some ribbon and hang it up!!  I could string up some ornaments at Christmas or snowflakes would be cute, too. Birthday banners would be great, too.  Looks like I need to whip up some more things and have them ready to go for every occasion! I love that I can leave the same wreath up all the time and just add one little item to the top to dress it up.

Thanks for checking out my tutorial!!  If you make one - come back and leave me a link!! I'd love to see your version!

Lisa

Monday, April 25, 2011

Want to see my new favorite accessory for my house?

Go check out The CSI Project today and you'll see how to make this:


My post will be up later today - so check it out!!  So honored that the CSI Girls share my tutorial on their site!! 

Thanks for checking in and Happy Monday!!
Lisa

Wednesday, April 13, 2011

A little Easter fun

Wow - two days in a row - wonder how long I can keep this up!

I mentioned yesterday that I had a fun project to show - it's nothing spectacular, but I had fun making it and wanted to share.  I've seen a million fabulous ideas on blogs for Easter decorating.  I have a storage container full of stuff, but for some reason I just couldn't bring myself to pull out all the same old things again.  I picked a few favorite pieces and then starting thinking of what I could come up with that was 'new' to me.

I really love banners and garland and I have the perfect spot to hang them - in our entry way from the foyer to the dining room, which currently is more like the toy room.  At any given time, you'll find Power Rangers or a Bat Mobile under the table and possibly Winnie the Pooh hanging out on top of the table.  Anyway, I love the idea of hanging something in that doorway to greet me each day.

I went through the massive amount of plastic eggs and picked out eggs with a hole in each end, all the same size and then grabbed my new favorite spray paint - Krylon Blue Ocean Breeze - and got busy.  I spray painted all the eggs with a few coats (and found a million other things to paint but that's for another day).  So once they were all dry (I'm so impatient) I strung them together.  I wasn't crazy about the end result.  I cut the string and started over, grabbing a bowl of cotton balls.  Yes, cotton balls!  I just thought the idea of Easter eggs and bunny tails together would be cute - so I restrung them.

I saw someone post about colored doilies and I went out and found some of my own.  I decided to make a little doily banner to go along with my eggs.  Here's the end result:


And a close up of my eggs:


I love that the eggs are all the same color and I really think the bunny tails are fun!!

Thanks for looking.  More projects coming up soon!!

Linking up to:


Lisa

Tuesday, April 12, 2011

Where has the time gone?

I just realized it's April (well, I didn't just realize that exactly) and I've only blogged ten times this year.  That is just sad!!  I'm going to work on the blog a little and make sure I'm a more regular blogger. 

It's warm out today, sunny, beautiful weather.  Would be great for walking around the track, or spray painting a project that's in the works, or working on my tan.  But, I'm not doing any of those things today.  Well, the day isn't over yet so there may be some spray painting later.

I have been a subbing fool lately.  I subbed every day but three since February 2nd (not counting Spring Break of course).  There's tons of things at home I've been neglecting.  I've barely put anything cute out for Easter.  There are several little things I wanted to make but only one of those have actually been completed.  A few birthday gifts have been in the works, too - but again, not completed yet.  I've been thinking about organization and spring cleaning!! 

On today's list - cleaning the craft table off so I can start a few more things that will hopefully be completed, cleaning up all the clutter that's collected around the house, trying to get Cole's toys contained to less space and eating a warm cinnamon roll right out of the oven.  That's not really on the list, but I'm still going to do it.

Later this week, I have a sewing date with a friend, we have a concert Friday night - can't wait for that.  Our favorite college football team is playing their spring practice game Saturday.  While this shouldn't be a big deal, it is and there will be about 100,000 people there - Roll Tide.  They are going to unveil a new statue of our coach, too.  Should be a fun day.

So, off to get things done.  We're having company spend the night after the game, so I must get things in order.  I'm thinking that means I need to get off the computer and get to work on cleaning up!  I promise I'll be back with a few crafty things this week.  CSI Project will have a challenge up that I've played along with so come back!!!  

Lisa

LinkWithin

Blog Widget by LinkWithin